
Choose the pressure from the vessel and process, not the valve
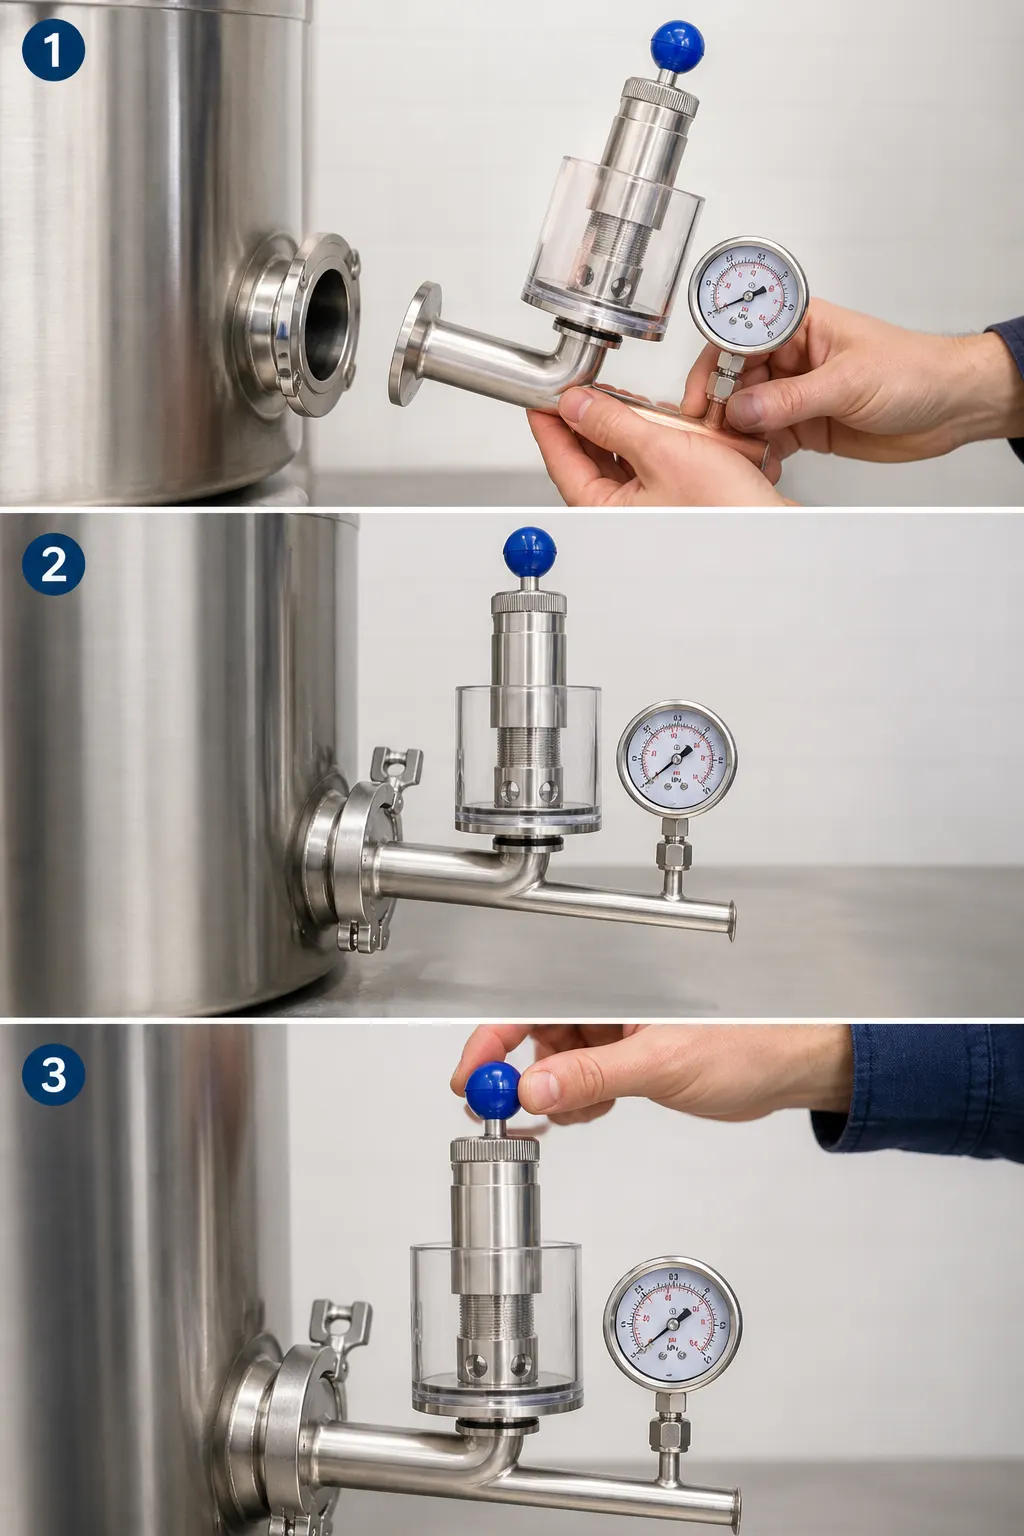
If you are asking what pressure should I ferment beer at with a spunding valve, the practical answer is that there is no single setting suitable for every beer, fermenter or brewing method. Start with the operating instructions and pressure limit for your pressure-capable fermenter, then identify the pressure required by the process you intend to follow. Only after those checks should you adjust the valve. The valve considered here has a stated adjustment range of 0.2–2.2 bar, so your intended setting must fall inside that range as well as within the vessel’s documented limit.
A spunding valve controls when gas is allowed to leave the fermenter. The published description says this model is normally closed: it remains closed while gas pressure is below the selected value and automatically releases pressure when that value is exceeded. That makes the selected setting a control point rather than a recommendation for the beer itself. In a homebrew kitchen, your immediate job is therefore to write down the fermenter limit and intended process setting before fitting or adjusting anything. If either figure is unknown, pause the pressure-fermentation plan rather than choosing a number by guesswork.
Set the job for a 20–25 litre UK brew day
For a typical 20–25 litre batch, volume alone does not determine the correct pressure. The important setting is the pressure inside the vessel, and that depends on the documented operating method rather than how many litres of wort are present. Before the brew reaches the fermenter, decide whether the valve will be used to manage fermentation pressure, retain pressure towards the end of fermentation, or control venting during another pressure-based step. Keeping those jobs separate makes it easier to select a setting deliberately and to recognise when advice from a different brewing process does not apply.
Lay out the pressure-control assembly on the kitchen or workshop bench before filling the fermenter. The valve’s title describes a 1.5-inch tri-clamp format, an L-type arrangement and a stainless steel pressure gauge, but the public product information does not give a complete list of connection parts in the package. Check the fermenter’s actual port, the mating faces and every clamp, seal or adaptor your assembly requires. A nominally similar connection name is not enough if the physical parts do not mate correctly or leave the valve awkward to read, adjust or clean.
Check whether the 0.2–2.2 bar range covers your plan
The documented adjustment range is 0.2–2.2 bar. For brewers reading instructions expressed in pounds per square inch, that is approximately 2.9–31.9 psi. These conversions explain the range; they are not suggested fermentation settings. If your planned control point is below 0.2 bar, this valve’s published range does not cover it. If the plan calls for a value above 2.2 bar, it is also outside the stated range. More importantly, being inside the valve’s range never overrides a lower limit given for the fermenter, lid, ports or connected equipment.
Consider how much of that range is genuinely useful for your brew rather than being impressed by the maximum figure. A valve that reaches 2.2 bar is not automatically appropriate for a vessel that must operate below that level. At the other end, a brewer looking for very low-pressure adjustment should not assume the valve can regulate below its stated 0.2 bar minimum. Record the intended setting in one unit, convert it once if necessary, and label both values on your brew sheet. That reduces the chance of confusing bar and psi while making adjustments beside the fermenter.
Verify the tri-clamp fit before wort enters the fermenter
The storefront identifies the valve as a 1.5-inch tri-clamp product and also gives a diameter description of 1–1.5 inches, or DN25–DN40. Because those descriptions cover more than one nominal reference, compare the valve information with the dimensions and connection specification supplied for your fermenter. Do not judge compatibility from the words “tri clamp” alone. Examine the port available on the vessel, confirm that the mating surfaces correspond, and make sure the installed position leaves enough room for the L-shaped body, pressure gauge and transparent movable cover.
Connection hardware deserves its own check. The public information describes the valve but does not establish a full package inventory for a clamp, gasket or adaptor, so do not plan brew day on the assumption that every connecting part is present. Assemble the empty, clean vessel on the workshop bench first and account for each interface between vessel and valve. If an adaptor is needed, include both sides of that adaptor in the compatibility check. A complete dry layout also shows whether the gauge can be seen without leaning over the fermenter or placing the exhaust area against a wall.
Keep pressure regulation separate from vessel protection
During normal operation, the documented behaviour is straightforward: below the selected pressure the valve closes, and above it the valve releases pressure. That describes process-pressure regulation. It does not, by itself, establish that the product can replace any separate over-pressure provision specified for the fermenter. Treat the vessel manufacturer’s protection arrangements as a distinct requirement. Do not remove, block or substitute a vessel-specific protective device merely because the adjustable valve also vents gas when its chosen threshold is exceeded.
This distinction matters when fermentation activity changes unexpectedly, a passage becomes obstructed or an adjustment is misunderstood. The working spunding setting is chosen for the brewing process, while independent vessel protection is there for a different purpose. Before using the assembly in a homebrew kitchen, identify both items on paper: write “process control” beside the spunding valve and “vessel protection” beside the provision named in the fermenter instructions. If the instructions are unavailable or unclear, resolve that gap before pressure is allowed to build. An adjustable range is not evidence that every vessel or protective role is covered.
Follow a bench checklist for setup, content and environment
Use this working sequence before filling the fermenter. Check 1: read the fermenter’s documented pressure limit and required protective arrangements. Check 2: write down the intended process setting in bar and, if your brewing notes use it, psi. Check 3: confirm that the figure lies within the valve’s stated 0.2–2.2 bar range and does not exceed the vessel limit. Check 4: compare the actual tri-clamp port and mating dimensions. Check 5: account for the clamp, seal and any adaptor without assuming they are included. Check 6: position the gauge and exhaust area where they remain visible and unobstructed.
Then check the product’s environment and aftercare details. The stated medium-temperature range is −10°C to +90°C, but every other component in the assembly still needs to suit the actual brewing conditions. The transparent PC movable cover can, according to the published information, be soaked and rinsed with alcohol. The listing also describes a rust-resistant and corrosion-resistant body that is easy to clean. Follow the stated care for each material and inspect accessible surfaces and connections before reassembly; do not extend the cover’s cleaning statement into an unsupported instruction for every component in the pressure system.
Use the transparent cover as an observation aid
The transparent outer cover provides a useful way to observe venting. The product information says water can be added inside the cover until the level reaches the exhaust port, allowing bubbles to be seen when pressure is released. That visible bubbling can help a brewer recognise that gas is passing through the valve. It does not prove an exact pressure, a leak-free assembly or a particular rate of release. Use it as one observable part of the process while also watching the gauge and checking the rest of the pressure-control setup.
The product title states that a stainless steel pressure gauge is fitted, but the available public information does not state gauge accuracy, calibration tolerance or adjustment repeatability. Avoid treating a displayed value as more precise than the documentation supports. Make adjustments cautiously and allow the system to respond rather than repeatedly turning the control in quick succession. If the indicated pressure behaves unexpectedly, stop and examine the setup instead of compensating with a much higher or lower setting. Check for mismatched connections, obstruction and an unsuitable adjustment range before deciding the brewing target itself is wrong.
Recognise the mismatches before buying or fitting
This valve is a poor match if your intended process requires adjustment below 0.2 bar or above 2.2 bar, if the fermenter does not offer a compatible tri-clamp connection, or if the available port cannot accommodate the body and gauge. It is also unsuitable as a purchase made solely on the assumption that it replaces the fermenter’s specified over-pressure provision. Buyers who need documented figures for gauge accuracy or set-point repeatability should obtain that information before relying on the display for a tightly controlled process, because those figures are not included in the public product details.
The grounded next step is to make a one-page pressure plan before brew day. Put the vessel limit at the top, followed by the intended process pressure, the same value converted into the gauge unit if needed, and confirmation that it sits inside 0.2–2.2 bar. Add the exact port specification, required connecting parts, valve position, cleaning plan and the vessel’s separate protective provision. Only proceed when every line can be completed from the relevant documentation and the assembled hardware. This approach answers the pressure question without pretending that one number can suit every beer or pressure-capable fermenter.